Here is the first of (maybe) four Halloween Mug Rug patterns. I even digitized the applique pattern for my embroidery machine!
Here is a closeup of the candy corn, since colors faded a bit on my full shots taken outside.....
As always, I am providing the mug rug pattern and even the candy corn machine embroidery design free to you, so keep reading.......
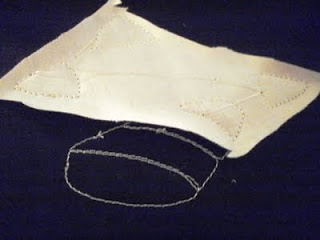
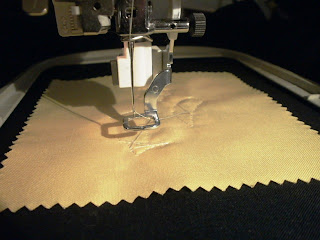
Hoop the black fabric and stabilizer (I used cut away) into a 5 x 7 (or larger) hoop. Load the black fabric/stabilizer only into the machine and stitch your layout outline (1st thread color.)
Now get ready to tack down the top color (I used white) of your candy corn. For each of the three colors in the candy corn, I used a single charm square. It is the perfect size for this pattern. One charm square covers the whole area and each segment of that color is tacked down in one step.
After stitching the tack down stitches for a color, trim away.
Those stitches you see on the black background are the layout stitches that sewed out in the first step. They show you where to lay your fabric for tacking down.
Be sure to trim all of your jump stitches between each step. Also, trim your applique as close to the seam line as possible. Applique or curved clipping scissors are a must for this project!
Repeat the process with the middle (second) color.
Note that I did not glue or baste my charm squares, I simply laid them down on top of the design and had no problems with them bunching up or flipping around. I was pleased with the ease of stitching out this pattern.
I used yellow in the middle, but I think that the orange was supposed to go in the middle and yellow on bottom. Oh well, no one can say this isn't original!
Once you have clipped the middle color pieces and all of the jump stitches, reload the hoop on your machine.
It's time for the tack down of the third and final color (orange in my case) on the bottom.
 After you have trimmed the final color pieces and jump stitches, reload the hoop into the machine and get ready for the applique stitching around the edges.
Again, be sure to trim as close to the tack down stitches as possible, so that you don't end up with any frayed edges as you see in this photo.I have made adjustments to my design to help, but you still have to trim well.
Sandwich and quilt your applique design.
Bind as desired and there you have it! I am going let my daughter take this one to her teacher, along with a jar of candy corn.
I am uploading the candy corn outline here, for those of you who want to do traditional applique or don't want to use the machine embroidery design.
If you would like the free machine embroidery design, I ask that you be a follower and leave me a comment telling me which design format you need for your machine. I will e-mail you the design file. If you don't know what type of file you need, tell me what brand machine you have.
Brief jargon: You may share a link to this blog for you friends to get the free patterns as well, but please do not give or loan anyone the patterns directly, without my written permission. If this pattern goes out two times or a million times, I want to know about it - that is my encouragement and my "payment."
Stay tuned, another Halloween design is just around the corner - I couldn't leave my son's teacher without a Halloween treat could I?
Until then, Piece!
Michele


this is really cute!
ReplyDeleteThanks for the candy corn mug rug pattern. So adorable. Please send the pattern in the "pes" format. Thank you for making this available to us. Have a blessed week.
DeleteI really like these candies. I need this in Jpeg
ReplyDeleteVery nice job!
ReplyDeleteYou can eliminate the frayed edges by doing two things:
- place your tack down stitch slightly smaller than your applique stitch
- use a broader satin stitch, which will cover the frayed edges more easily
A reply to the comment about eliminating the frayed threads - thank you very much for the information......actually I have made adjustments to my design. I appreciate your input.
ReplyDeleteMichele
Really cute Michele and you have conquered one more thing in life....smile.
ReplyDeletethis is So cute!
ReplyDeleteHow cute! Great mug rugs, love the candy corn.
ReplyDeleteI love the candy corn mug rug and would like the pattern. My embroidery machine takes XXX format. Thank you so much for doing this.
ReplyDeleteThink this is so cute!! Would love to have this emb design either in vip or vip3. Thankyou so much
ReplyDeleteJudy
HI,
ReplyDeleteJust love the candy corn mug rug -- would like the PES format -- thank you for the great patterns !
Hi I just found your blog I love the mug rugs .I'm trying to learn quilting what agreat way to start would love the candy corn embroidery that would make it so much easier. Thanks so much look forward to learning much Jude
ReplyDeleteOops for got to say PES format for the candy corn
ReplyDeleteJude