Showing posts with label Mug Rug. Show all posts

Monday, December 7, 2015

Amish Bars - mug rug pattern - free

Today's free mug rug pattern is my interpretation of an antique quilt found in the collection of the International Quilt Study Center & Museum. If you have not had a chance to visit their website, please make sure to visit. They have a collection of over 3500 quilts - most of which you can view online....talk about eye candy!

Anyway, the quilt I used is an Amish Bars/Strippie quilt that is estimated to have been made 1890 and 1910 in Pennsylvania. Here is a link to the photo of the original quilt, found on the International Quilt Study Center & Museum site and here is a link to the detailed quilt information. I hope that you will enjoy making it.

So, here is my interpretation - albeit tiny in comparison and squinched in the middle to make a mug rug:


The finished size of this mug rug is 8 1/2" by 6 1/2" and it uses 3 fabrics. From what I can tell, the original quilt was Dark Red, Salmon Pink and Off-white. Obviously, you can make yours any color you choose. Here are the traditional piecing instructions:

 
Cutting Instructions:
All measurements include 1/4" wide seam allowances.
From the Dark Red Fabric, cut:
  • 1 strip 1" x 18" long 
    • Cross cut into:
      • 2 strips 3 1/2" long
      • 2 strips 5 1/2" long
  • For the backing - One 9" x 7" rectangle
  • For the binding - One 1-1/2" x 45" (or width of fabric)
From the Salmon Pink fabric:
  • 1 strip 1 1/2" x 29"
    • Cross cut into:
      • 2 strips 6 1/2" long
      • 2 strips 4 1/2" long
      • 2 strips 3 1/2" long
From the off-white fabric, cut:
  • 1 strip 1 1/2" x  16 1/2"
    • Cross cut into:
      • 3 strips 3 1/2" long
      • 4 squares 1 1/2"
  • 1 strip 1" x 4"
    • Cross cut into:
      • 4 squares 1"
Constructing the top:
Make center vertical bar block:
  1. Using all 3 1/2" x 1 1/2" strips - starting and ending with off-white, alternate sewing off-white and salmon pink strips long-sides together.
  2. Press toward salmon pink.
  3. Block should measure 5 1/2" x 3 1/2"

Add inner border:
  1. Add dark red 3 1/2" by 1" strips to each end of vertical bar block.
  2. Construct top and bottom inner border pieces by sewing two off-white 1" squares to both ends of a dark red 1" x 5 1/2"strip.
  3. Sew top and bottom inner border pieces to the top and bottom of the vertical bar block, which already has inner border attached at ends.
  4. Top should now measure 4 ½” x 6 ½”.

Add outer border:
  1. Sew left and right end of outer border to left and right ends of inner border.
  2. Construct top and bottom outer border pieces by sewing two off-white 1 1/2" squares to each end of 1 1/2" x 6 1/2" salmon pink
  3. Attach top and bottom outer border pieces to middle section.
  4. Top should now measure 8 ½” x 6 ½”

Finishing:
Sandwich, quilt and bind as desired.


That's it! Please enjoy this pattern, but as with all my patterns, please do not copy or use any portion other than for your personal use in making a mug rug. If you want to share it with friends, please send them a link to my blog.
May your bobbin always be full!
Michele Hester

Saturday, October 10, 2015

Butterly/Flower Mug Rug

Click here to get the pattern
Spring weather is notoriously unpredictable. On some mornings you might still need a piping hot mug of coffee or tea to start your day. This Flower and Butterfly Mug Rug is perfect for your coffee table or desk. It's a reminder that even when you're shivering over your morning cup of joe, the outside temperature is bound to rise. You'll have so much fun piecing together this quilted mug rug that you might want to make some for your friends as well.


This pattern is now available on Craftsy.

Thursday, October 6, 2011

Boo! - a free Halloween Pattern

I have another free mug rug pattern, or free embroidery design, or free mini quilt pattern for you.....what you call it is up to you - I just think it was a lot of fun to make!

 This one is a combination of applique and machine embroidery, but I am also including the outline drawing, so that if you want to do traditional applique or even hand embroidery, you have those options as well.
 I am quite please with how this stitched out.....now I just have to get it sandwiched and quilted for Will's teacher! I am always a day late it seems.


 If you don't want to miss out on future free quilt related patterns, please sign up to follow me. I would love to hear your comments and certainly would like to see photos if you stitch out the design. To get the files:

Boo! - jpeg for traditional applique
Boo! - .xxx embroidery file
Boo! - .pes embroidery file
Boo! - .exp embroidery file

Until next time - Piece!

Wednesday, September 14, 2011

Halloween Mug Rug

No it isn't Monday, and depending on how you look at it, I am either really late, or really early for the next Mug Rug Monday. However, I was so excited with how this Halloween Mug Rug turned out, that I couldn't wait!


Here is the first of (maybe) four Halloween Mug Rug patterns. I even digitized the applique pattern for my embroidery machine!


Here is a closeup of the candy corn, since colors faded a bit on my full shots taken outside.....

As always, I am providing the mug rug pattern and even the candy corn machine embroidery design free to you, so keep reading.......

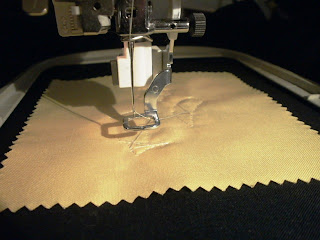
Hoop the black fabric and stabilizer (I used cut away) into a 5 x 7 (or larger) hoop. Load the black fabric/stabilizer only into the machine and stitch your layout outline (1st thread color.)

Now get ready to tack down the top color (I used white) of your candy corn. For each of the three colors in the candy corn, I used a single charm square. It is the perfect size for this pattern. One charm square covers the whole area and each segment of that color is tacked down in one step.


 After stitching the tack down stitches for a color, trim away.
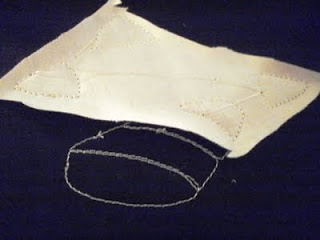
Those stitches you see on the black background are the layout stitches that sewed out in the first step. They show you where to lay your fabric for tacking down.


 Be sure to trim all of your jump stitches between each step. Also, trim your applique as close to the seam line as possible. Applique or curved clipping scissors are a must for this project!

Repeat the process with the middle (second) color.

Note that I did not glue or baste my charm squares, I simply laid them down on top of the design and had no problems with them bunching up or flipping around. I was pleased with the ease of stitching out this pattern.
I used yellow in the middle, but I think that the orange was supposed to go in the middle and yellow on bottom. Oh well, no one can say this isn't original!

Once you have clipped the middle color pieces and all of the jump stitches, reload the hoop on your machine.

It's time for the tack down of the third and final color (orange in my case) on the bottom.

After you have trimmed the final color pieces and jump stitches, reload the hoop into the machine and get ready for the applique stitching around the edges.


Again, be sure to trim as close to the tack down stitches as possible, so that you don't end up with any frayed edges as you see in this photo.I have made adjustments to my design to help, but you still have to trim well.
 Sandwich and quilt your applique design.


Bind as desired and there you have it! I am going let my daughter take this one to her teacher, along with a jar of candy corn.

 I am uploading the candy corn outline here, for those of you who want to do traditional applique or don't want to use the machine embroidery design.

If you would like the free machine embroidery design, I ask that you be a follower and leave me a comment telling me which design format you need for your machine. I will e-mail you the design file. If you don't know what type of file you need, tell me what brand machine you have.

Brief jargon: You may share a link to this blog for you friends to get the free patterns as well, but please do not give or loan anyone the patterns directly, without my written permission. If this pattern goes out two times or a million times, I want to know about it - that is my encouragement and my "payment."

Stay tuned, another Halloween design is just around the corner - I couldn't leave my son's teacher without a Halloween treat could I?

Until then, Piece!
Michele

Monday, June 20, 2011

Mug Rug Monday - Free Motion Quilting

Today's free mug rug pattern is all about free motion quilting! If you have never done free motion quilting, or you want more practice, this is an excellent project. I started with a Mandala drawing I found online. If you don't like the one I have chosen, you can find 1000's of them just by googling the words free Mandala. First, I sized the Mandala correctly and I printed the Mandala on a plain piece of paper - this helped me know where to position the paper in the next step.
 Next, I cut a piece of freezer paper a little larger than the actual Mandala drawing. It doesn't have to be neat, just bigger.
 Next, I ironed that piece of freezer paper onto the top of the Mandala I just printed. I used a medium setting on my iron for this step.
 Here you can see the freezer paper on top of the original printout. Next, place the paper into your printer, being careful to position it so that it prints the same was as it did before - thus hitting the freezer paper target.
 You now have your design printed on the paper side of the freezer paper. Remove it from the printer paper.

 Make a quilt sandwich larger than you want your finished mug rug to be - I made mine 10 x 7. Get your machine setup for free motion quilting. [Correct foot, quilting table, threads of choice, lower feed dogs, etc.] Baste around the outer edges of the sandwich to hold it in place. While you are basting, make sure that your tension is perfect, so you don't have to worry about it when you start your free motion quilting.
 Center you freezer paper image onto your working area.
 IMPORTANT - use a pressing sheet to protect your iron.......Iron the image to your mug rug top.
Following the design on the freezer paper, begin free motion quilting through the freezer paper. Pay attention that you don't miss any spots. If you do though, you can fix it after you remove the paper if it is noticeable.

Relax and have fun with the quilting - this is a mug rug - it is a learning experience! Your thread line will NOT match the drawing exactly, but once you remove the drawing you won't know where the original drawing lines were. Use a little creative license as well, you don't have to use every single aspect of the drawing - for instance I didn't even attempt to do anything with the dots - too tedious!

If you don't believe me, take if from a professional - I took a class with Sue Nickels once and she doesn't always match the line either - and she has one some amazing quilting ribbons and prizes!
Now, wasn't that fun! Next, remove the freezer paper from you mug rug. Tear off the biggest parts first, then sit down in from of the TV with a pair of tweezers or anything else that helps you finish the task of removing the freezer paper.


When you finish picking the freezer paper off, your studio floor might look something like this. ;-)


 The back of your mug rug will look something like this......


And the front might look a little like this:


Remember, these mug rugs are about building our skills. Don't write this one off until you try it! The quilting part is a lot of fun.

Until next time - Piece!
Michele Hester

Monday, June 6, 2011

Mug Rug Monday - Grow

Here is the newest mug rug created for Mug Rug Monday:


Not too long ago, one of the blogs I read had a very popular comment string where quilter’s were being asked to “vent” and say out loud things they might not normally admit to – predominantly about quilting. There were several people on there who commented on the "mug rug movement" and expressed that they didn't get why it was such a popular thing to do. They couldn’t understand why anyone would be interested in making a glorified coaster. 

For me, mug rugs are little quilts. Little quilts which require the same skills and processes as large quilts. I see them as an opportunity to try different techniques and end with a finished product rather than a mismatched UFO square to add to a growing pile. 

When completing a mug rug, I go through the entire quilt making process, but in a much shorter period of time than that required by a larger quilt. With a mug rug, I still have to make color choices, design choices, quilting motif choices, binding, etc. No part of the process is skipped. 

Another thing I like about mug rugs, is that it is also an opportunity to try out new tools. Whether they be marking tools, quilt design tools, cutting tools……..most can be used on a mug rug.

Don’t get me wrong, I know mug rugs aren’t for everyone, but don’t close your eyes to them just because you don’t get their size! Look at them as a growth opportunity in your quilting life! Grow as a quilter - this is what I had in mind when I made this week's mug rug entitled "Grow." 

A few things that I have on my list of skills to work on are free-motion writing on quilts, free motion embroidery, black outlining and perfecting my binding techniques.

For this quilt, there is no patter per se, but rather a process to follow. You will be designing your own flower motif. Start by cutting a solid background fabric approximately 7 inches by 10 inches (this will later trim down to 6.5 inches by 9.5 inches. Pick out your flower fabric and you leaf fabric. It may be harder than you think.....I had a difficult time finding just the right green to go with my orange/red graded fabric. 

Using a pencil, draw your flower onto the paper side of a light-weight double fusible stabilizer. I used "wonder-under." Note I said draw and not trace - no there is not a pattern - part of the process is to be brave and draw your own flower! Do a rough cut out of the stabilizer and iron it onto the back of your flower fabric. Now is the time to cut on the lines you have drawn. Repeat this process with several leaves. Remove the paper backing from your pieces. 

Next play with the general placement of your applique pieces. Once you have decided on your placement, iron the pieces to the background fabric.

Make your quilt sandwich and baste the layers together.

Next comes the free motion embroidery which brings details to the flowers and leaves. Then, sew your word.....you can cheat here and write the word with a water soluble marker first and "trace" it with your sewing stitches. Use a word that will inspire you! If you wish to add any more quilting, now is the time to do that.

Trim your quilt to 6.5 inches by 9.5 inches and bind. Now aren't you proud of yourself! I can understand why no one would want to put a coffee and cookie on it! Hang it on a wall if you like!

Whether you use this mug rug idea or any of my other free mug rug patterns, don't forget I would love to see your completed creations, so please send them to me. I also would love to hear what you are learning in the process of quilting! I won't post your photos without your permission.

Until next time -
Piece,
Michele Hester

Saturday, May 21, 2011

Walking on Sunshine - link repaired

Some were having problems downloading Walking on Sunshine, so I reloaded the file:

CLICK HERE TO DOWNLOAD THE PATTERN

Please let me know if there are any more problems.

Michele

Mug Rug - Butterfly reloaded

It seems that this pattern is the one people had most difficulty downloading:
CLICK HERE FOR THE PATTERN


I have reloaded the pattern to google docs and hopefully everyone can get it now. Please let me know if you continue to have problems.

Friday, May 13, 2011

Be Still - A completed Mug Rug

One of my readers completed the Be Still Mug Rug and sent me a photo. I think she did a great job - what about you?


You can visit Wendy's blog here, let her know I sent you.

Michele Hester

Saturday, April 30, 2011

Glad to be back

We had a great time in Florida, to return to additional storm damage from heavy winds that struck while we were gone. We had several more large hickory trees knocked down this time and more property damage. One last large Cedar tree's top was twisted and snapped out this week when the huge storms rolled through. We are still grateful to have no loss of life - but after being hit and damaged by THREE storms, I am a little weary of weather now. I am tired of seeing the damage each day when we go outside of our home - the insurance adjuster FINALLY showed up on Friday of last week, so we were able to begin the cleanup on Easter Sunday. Okay, enough whining.........

On the better side of life - my quilting studio is finished....at least enough for me to be in it and sew again! I have not sewn any for almost a month - that makes for a depressing life too. I must say that unpacking and touching all of my fabric stash was GREAT therapy!

Today I finished the Playful Pinwheel mug rug, and I have to tell you about a problem with the pattern, which has been fixed. Here is the mug rug I made using the pattern I published for you originally:


Here is the way it was supposed to look:


One of my readers originally reported a problem with the pattern to me a couple of weeks ago, but because I couldn't get to my sewing machine, I was unable to test things out. Once I got two quadrants completed, it was easy to see there was a problem with the pattern - I realized I only included the templates/pattern for one quadrant, and I needed to include two. The reader told me that the four corners didn't fit together right, but I thought that flipping the pattern over for two of the quadrants would resolve the issue. Obviously, my brain wasn't wrapping around the pattern fully.

Anyway, I have updated the pattern to include two quadrants. One where the "swish" comes from the short side of the rectangle and the other where the "swish" comes from the long side of the rectangle. If you have already tried to make this mug rug - I am very sorry for the error...if you haven't tried it yet, it really is a cute pattern, and great curved piecing practice. I took lots of photos when I made mine as I plan to do a tutorial on it in the near future. Here is the back side, which shows the quilting:


If you have made one, please send me photos, I would love to see what you did with the pattern!

I plan to get back to the Mug Rug Monday patterns in another week - I need a little more time to settle into my new studio and I want to get some sewing done!

Until then,
Michele Hester

Monday, April 4, 2011

Mug Rug Monday - Walking on Sunshine

For those of us who are FINALLY experiencing Spring, it is truly a celebration. For those of you who still can't see the ground through the snow and ice, it will be here soon......Today's mug rug is a celebration of Spring.

CLICK HERE FOR PATTERN


One of my inspirations on this design is the work of MamaCJT....her blog is one of my favorites. I love her whimsical designs and her great attitude. For this mug rug, I plan to use her raw edge applique technique.

Don't forget there are several free patterns here on my blog - be sure to check them out by clicking on Free Patterns at the top of this page. Enjoy!

Michele

Monday, March 28, 2011

Mug Rug Monday - Amish Bar Quilt

Today's free mug rug pattern is my interpretation of an antique quilt found in the collection of the International Quilt Study Center & Museum. If you have not had a chance to visit their website, please make sure to visit. They have a collection of over 3500 quilts - most of which you can view online....talk about eye candy!

Anyway, the quilt I used is an Amish Bars/Strippie quilt that is estimated to have been made 1890 and 1910 in Pennsylvania. Here is a link to the photo of the original quilt, found on the International Quilt Study Center & Museum site and here is a link to the detailed quilt information. I hope that you will enjoy making it.

So, here is my interpretation - albeit tiny in comparison and squinched in the middle to make a mug rug:


The finished size of this mug rug is 8 1/2" by 6 1/2" and it uses 3 fabrics. From what I can tell, the original quilt was Dark Red, Salmon Pink and Off-white. Obviously, you can make yours any color you choose. Here are the traditional piecing instructions:

 
Cutting Instructions:
All measurements include 1/4" wide seam allowances.
From the Dark Red Fabric, cut:
  • 1 strip 1" x 18" long 
    • Cross cut into:
      • 2 strips 3 1/2" long
      • 2 strips 5 1/2" long
  • For the backing - One 9" x 7" rectangle
  • For the binding - One 1-1/2" x 45" (or width of fabric)
From the Salmon Pink fabric:
  • 1 strip 1 1/2" x 29"
    • Cross cut into:
      • 2 strips 6 1/2" long
      • 2 strips 4 1/2" long
      • 2 strips 3 1/2" long
From the off-white fabric, cut:
  • 1 strip 1 1/2" x  16 1/2"
    • Cross cut into:
      • 3 strips 3 1/2" long
      • 4 squares 1 1/2"
  • 1 strip 1" x 4"
    • Cross cut into:
      • 4 squares 1"
Constructing the top:
Make center vertical bar block:
  1. Using all 3 1/2" x 1 1/2" strips - starting and ending with off-white, alternate sewing off-white and salmon pink strips long-sides together.
  2. Press toward salmon pink.
  3. Block should measure 5 1/2" x 3 1/2"

Add inner border:
  1. Add dark red 3 1/2" by 1" strips to each end of vertical bar block.
  2. Construct top and bottom inner border pieces by sewing two off-white 1" squares to both ends of a dark red 1" x 5 1/2"strip.
  3. Sew top and bottom inner border pieces to the top and bottom of the vertical bar block, which already has inner border attached at ends.
  4. Top should now measure 4 ½” x 6 ½”.

Add outer border:
  1. Sew left and right end of outer border to left and right ends of inner border.
  2. Construct top and bottom outer border pieces by sewing two off-white 1 1/2" squares to each end of 1 1/2" x 6 1/2" salmon pink
  3. Attach top and bottom outer border pieces to middle section.
  4. Top should now measure 8 ½” x 6 ½”

Finishing:
Sandwich, quilt and bind as desired.


That's it! Please enjoy this pattern, but as with all my patterns, please do not copy or use any portion other than for your personal use in making a mug rug. If you want to share it with friends, please send them a link to my blog.
May your bobbin always be full!
Michele Hester

Monday, March 21, 2011

Mug Rug Monday - Playful Pinwheel

Springtime is here and what better way to celebrate than with a colorful pinwheel! This week's free mug rug pattern is called Playful Pinwheel.


Our past pieced patterns have been fairly simple ones, so let's kick it up a notch this week with some curved piecing. Don't forget, the wonderful thing about mug rugs is they provide us an opportunity to master different skills, without committing to a large project. Okay, are you ready for the challenge? There are two quadrant patterns with templates - you will need to make two of each quadrant.  Click here to get the first template pattern. and click here for the second template. You will need to make 4 of these blocks. If you carefully cut the fabric along the lines provided, you will have placement guides for your corners and edges.

If you haven't done curved piecing before, here are a few free quilting video tutorials that might help with your curved piecing techniques:


Enjoy making your mug rug and building those quilting skills and have a blessed week!
Michele Hester

Friday, March 18, 2011

Mug Rug Monday - Flower and Butterfly (free mug rug pattern)

I am a little late, so please forgive me. We were in New Orleans for a brief vacation and I failed to plan ahead and get my mug rug pattern ready for you. Here is this week's free mug rug pattern:


Click here to download the pattern.


I don't know about you, but I am so glad to see Spring arriving! This week's mug rug pattern is an applique pattern in celebration of Spring. I hope that you enjoy it. I will be using a raw edge applique technique on this one. The pattern is here. You will see that there is a 1/4" seam allowance included in the pattern, so just cut that away if you intend to use a raw edge technique.

Thanks for stopping by and I will see you back on Monday!

Michele Hester

Tuesday, March 8, 2011

Mug Rug Monday - Rail Fence (free mug rug pattern)

I started home schooling my daughter Sabra this week. It is something that I have thought about since she was born, but just never felt I had the patience to do. Well, because of some really crazy things (WOW, who knew the girl drama could be this intense in the 3rd grade - there are some really mean girls around already) that happened to her in her school this last week, I decided it was time to make a drastic change.  .....Today, our first official day at our home school went very - well obviously it is all still very new to both of us. However, I am just now getting around to my post. Believe it or not, I know how to schedule posts, I just can't force myself to wait, once I get something written. Something about the excitement of that "hot off the press" smell.

Without further ado, here is this week's free mug rug pattern. This week's mug rug pattern is based on a very traditional quilt square called Rail Fence. Here is the mug rug:


Since it is really easy for traditional piecing, I thought I would just give the "loose" instructions on making it.....

I have chosen two colors in my sample. We will refer to the blue as color A and the red as color B. You will need two 1 1/2" wide strips of Color A and one 1 1/2" wide strip of Color B. Strips should be approximately 25 inches long for wiggle room.....

  1. Sew one strip of Color A and one strip of Color B together. 
  2. Press seam toward Color B. 
  3. Next, sew another strip of Color A to the other side of Color B. 
  4. Press seam toward Color A this time - so that both seams are pressed in the same direction.
  5. You should now have a 3-strip unit that measures 3 1/2" by 25 inches (or however long your strips were)
  6. Cut this 3-strip unit into 3 1/2" length pieces, to make 3 1/2" squares. 
  7. Arrange the blocks and join according to the sample image above. 
  8. To quilt, I recommend stitch in the ditch (great tip here) for this one.
  9. Bind according to your favorite (or not so favorite) method. ;-)

Here is a quilt I made a few years ago where I used a rail fence for my setting squares......

The rail fence blocks are stitched in the ditch. I did a quilt as you go method, that I made up as I went.....I actually pieced and quilted each row as a unit, and then I attached the rows together. The gorgeous embroidery patterns are ones that I got free off the internet 7 or 8 years ago, so I couldn't tell you where they were from....I have seen them out there recently, so maybe somebody else will comment and remind me from whence they came?

Here are some close-ups of some of the embroidered blocks:


The "shell" quilting around the outside of the embroidery blocks was done free motion, and is really a simple free motion pattern. I used regular old masking tape to mark my channel quilting surrounding the embroidery. Hope you enjoyed my trip down memory lane.. ;-)

This quilt was made for my daughter Sabra - I guess that means I have now come full circle in this post haven't I?  LOL Have a blessed week and I will see you next week!

Michele

P.s.

Beautiful Classic Floral Spray - Machine Embroidery Design

Click here for machine embroidery file Watch this design come to life on your fabric canvas. This gorgeous design has been thoughtfu...