Showing posts with label Machine Embroidery Patterns. Show all posts

Saturday, June 24, 2017

Embird Outline Stitches - Free sampler stitch-out file


If you are an Embird user or are considering purchasing Embird, I created a stitch out file of all the outline stitches available in Embird (version 2017.) I think it is helpful to have stitch-outs on hand when deciding which stitches to use. These can be used on Appliques or just as decorative stitching, etc.


You can put them into stitch samplers. They can be placed on any outline shape you create. Spirals of some of these designs would be pretty - even as a design element on a quilt. Hmmm.....I've got my brain working now!


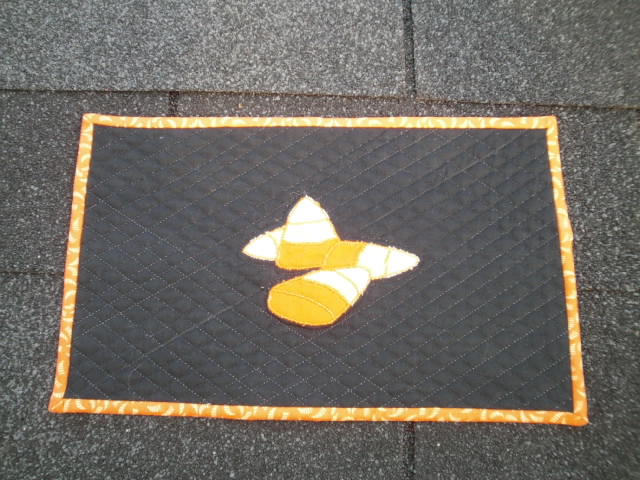
I found the candlewick stitches to be a little weird, here is a photo of the back of the stitch-out. See how there is virtually no bobbin thread showing? Not sure if it is the bobbin thread choice, fabric or the stitch. When I use it on another item, I will let you know if it turns out differently.


After I stitched out, I used a fine tip permanent marker to label them with the name they are referred to in Embird.

I know - I could have been more industrious and embroidered the text, but it was late at night and I was anxious to see the stitches.


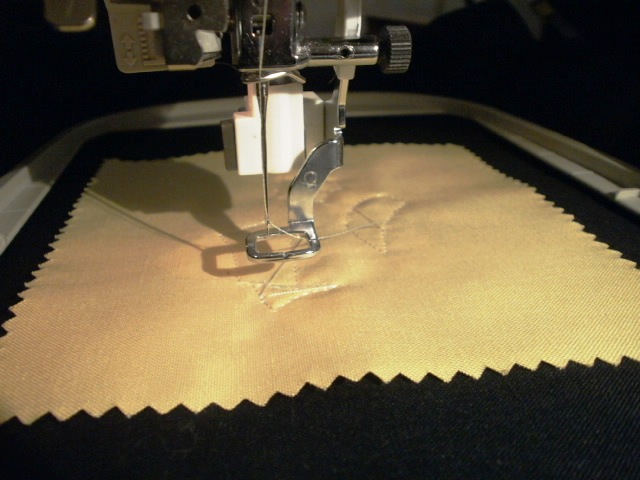
I am pleased with the stitch-out, as I didn't use any stabilizer and had VERY little pucker with just the fabric hooped in the largest frame. The fabric is a table-cloth remnant, so it is fairly heavy.


All of the stitches are done in the default settings in Embird - I didn't change any sizes. Note they adjusted to the size of the line as well. I didn't plan the length of the line - yet they all seem to begin and end in a nice place.
If you would like to stitch out this sampler for yourself, I have included the file in PES. The size is for the 9 1/2 x 14 hoop on the Destiny embroidery machine. It should work on the Brother Dream machine as well. Click here to get the file.

If you want it in a different size or format - you can easily do this with you copy of Embird.


Monday, February 22, 2016

Embroidered quilt labels


We are hanging our annual quilt show tomorrow at the Rome, GA library.  It is always so exciting to see the quilts adorn the walls and staircase.  In preparation, I needed to label my two quilts that will be hanging.  I made them using my embroidery machine.  I went ahead and made 4 of them, so I guess that means I am committed to two more finishes in 2014!


I used fusible webbing on the back, so all I had to do was iron it on.....have I ever mentioned how much I hate handwork?


Wednesday, April 23, 2014

what do you do when you have just a little time?


I make something small!  There is a lot of satisfaction in being able to do something from start to finish in a weekend.

I digitized the stitching and used my embroidery machine for the stitch out.  I am quite pleased with how it turned out.


I have been wanting to make one of these pin chushions for a while. 


I hope you have some time for something creative soon!

Thursday, October 6, 2011

Boo! - a free Halloween Pattern

I have another free mug rug pattern, or free embroidery design, or free mini quilt pattern for you.....what you call it is up to you - I just think it was a lot of fun to make!

 This one is a combination of applique and machine embroidery, but I am also including the outline drawing, so that if you want to do traditional applique or even hand embroidery, you have those options as well.
 I am quite please with how this stitched out.....now I just have to get it sandwiched and quilted for Will's teacher! I am always a day late it seems.


 If you don't want to miss out on future free quilt related patterns, please sign up to follow me. I would love to hear your comments and certainly would like to see photos if you stitch out the design. To get the files:

Boo! - jpeg for traditional applique
Boo! - .xxx embroidery file
Boo! - .pes embroidery file
Boo! - .exp embroidery file

Until next time - Piece!

Wednesday, September 14, 2011

Halloween Mug Rug

No it isn't Monday, and depending on how you look at it, I am either really late, or really early for the next Mug Rug Monday. However, I was so excited with how this Halloween Mug Rug turned out, that I couldn't wait!


Here is the first of (maybe) four Halloween Mug Rug patterns. I even digitized the applique pattern for my embroidery machine!


Here is a closeup of the candy corn, since colors faded a bit on my full shots taken outside.....

As always, I am providing the mug rug pattern and even the candy corn machine embroidery design free to you, so keep reading.......

Hoop the black fabric and stabilizer (I used cut away) into a 5 x 7 (or larger) hoop. Load the black fabric/stabilizer only into the machine and stitch your layout outline (1st thread color.)

Now get ready to tack down the top color (I used white) of your candy corn. For each of the three colors in the candy corn, I used a single charm square. It is the perfect size for this pattern. One charm square covers the whole area and each segment of that color is tacked down in one step.


 After stitching the tack down stitches for a color, trim away.
Those stitches you see on the black background are the layout stitches that sewed out in the first step. They show you where to lay your fabric for tacking down.


 Be sure to trim all of your jump stitches between each step. Also, trim your applique as close to the seam line as possible. Applique or curved clipping scissors are a must for this project!

Repeat the process with the middle (second) color.

Note that I did not glue or baste my charm squares, I simply laid them down on top of the design and had no problems with them bunching up or flipping around. I was pleased with the ease of stitching out this pattern.
I used yellow in the middle, but I think that the orange was supposed to go in the middle and yellow on bottom. Oh well, no one can say this isn't original!

Once you have clipped the middle color pieces and all of the jump stitches, reload the hoop on your machine.

It's time for the tack down of the third and final color (orange in my case) on the bottom.

After you have trimmed the final color pieces and jump stitches, reload the hoop into the machine and get ready for the applique stitching around the edges.


Again, be sure to trim as close to the tack down stitches as possible, so that you don't end up with any frayed edges as you see in this photo.I have made adjustments to my design to help, but you still have to trim well.
 Sandwich and quilt your applique design.


Bind as desired and there you have it! I am going let my daughter take this one to her teacher, along with a jar of candy corn.

 I am uploading the candy corn outline here, for those of you who want to do traditional applique or don't want to use the machine embroidery design.

If you would like the free machine embroidery design, I ask that you be a follower and leave me a comment telling me which design format you need for your machine. I will e-mail you the design file. If you don't know what type of file you need, tell me what brand machine you have.

Brief jargon: You may share a link to this blog for you friends to get the free patterns as well, but please do not give or loan anyone the patterns directly, without my written permission. If this pattern goes out two times or a million times, I want to know about it - that is my encouragement and my "payment."

Stay tuned, another Halloween design is just around the corner - I couldn't leave my son's teacher without a Halloween treat could I?

Until then, Piece!
Michele

Beautiful Classic Floral Spray - Machine Embroidery Design

Click here for machine embroidery file Watch this design come to life on your fabric canvas. This gorgeous design has been thoughtfu...