Thursday, March 31, 2011

Say hello to the newest Taste of Home Field Editor!

I am so excited! I was chosen to be a field editor for the Taste of Home magazine! I don't plan to start another blog, so you guys will just have to put up with some cooking stuff on here too - you do eat don't you?

I look forward to this opportunity and continuing with my quilting pleasures.

Michele Hester

Monday, March 28, 2011

Mug Rug Monday - Amish Bar Quilt

Today's free mug rug pattern is my interpretation of an antique quilt found in the collection of the International Quilt Study Center & Museum. If you have not had a chance to visit their website, please make sure to visit. They have a collection of over 3500 quilts - most of which you can view online....talk about eye candy!

Anyway, the quilt I used is an Amish Bars/Strippie quilt that is estimated to have been made 1890 and 1910 in Pennsylvania. Here is a link to the photo of the original quilt, found on the International Quilt Study Center & Museum site and here is a link to the detailed quilt information. I hope that you will enjoy making it.

So, here is my interpretation - albeit tiny in comparison and squinched in the middle to make a mug rug:


The finished size of this mug rug is 8 1/2" by 6 1/2" and it uses 3 fabrics. From what I can tell, the original quilt was Dark Red, Salmon Pink and Off-white. Obviously, you can make yours any color you choose. Here are the traditional piecing instructions:

 
Cutting Instructions:
All measurements include 1/4" wide seam allowances.
From the Dark Red Fabric, cut:
  • 1 strip 1" x 18" long 
    • Cross cut into:
      • 2 strips 3 1/2" long
      • 2 strips 5 1/2" long
  • For the backing - One 9" x 7" rectangle
  • For the binding - One 1-1/2" x 45" (or width of fabric)
From the Salmon Pink fabric:
  • 1 strip 1 1/2" x 29"
    • Cross cut into:
      • 2 strips 6 1/2" long
      • 2 strips 4 1/2" long
      • 2 strips 3 1/2" long
From the off-white fabric, cut:
  • 1 strip 1 1/2" x  16 1/2"
    • Cross cut into:
      • 3 strips 3 1/2" long
      • 4 squares 1 1/2"
  • 1 strip 1" x 4"
    • Cross cut into:
      • 4 squares 1"
Constructing the top:
Make center vertical bar block:
  1. Using all 3 1/2" x 1 1/2" strips - starting and ending with off-white, alternate sewing off-white and salmon pink strips long-sides together.
  2. Press toward salmon pink.
  3. Block should measure 5 1/2" x 3 1/2"

Add inner border:
  1. Add dark red 3 1/2" by 1" strips to each end of vertical bar block.
  2. Construct top and bottom inner border pieces by sewing two off-white 1" squares to both ends of a dark red 1" x 5 1/2"strip.
  3. Sew top and bottom inner border pieces to the top and bottom of the vertical bar block, which already has inner border attached at ends.
  4. Top should now measure 4 ½” x 6 ½”.

Add outer border:
  1. Sew left and right end of outer border to left and right ends of inner border.
  2. Construct top and bottom outer border pieces by sewing two off-white 1 1/2" squares to each end of 1 1/2" x 6 1/2" salmon pink
  3. Attach top and bottom outer border pieces to middle section.
  4. Top should now measure 8 ½” x 6 ½”

Finishing:
Sandwich, quilt and bind as desired.


That's it! Please enjoy this pattern, but as with all my patterns, please do not copy or use any portion other than for your personal use in making a mug rug. If you want to share it with friends, please send them a link to my blog.
May your bobbin always be full!
Michele Hester

Monday, March 21, 2011

Mug Rug Monday - Playful Pinwheel

Springtime is here and what better way to celebrate than with a colorful pinwheel! This week's free mug rug pattern is called Playful Pinwheel.


Our past pieced patterns have been fairly simple ones, so let's kick it up a notch this week with some curved piecing. Don't forget, the wonderful thing about mug rugs is they provide us an opportunity to master different skills, without committing to a large project. Okay, are you ready for the challenge? There are two quadrant patterns with templates - you will need to make two of each quadrant.  Click here to get the first template pattern. and click here for the second template. You will need to make 4 of these blocks. If you carefully cut the fabric along the lines provided, you will have placement guides for your corners and edges.

If you haven't done curved piecing before, here are a few free quilting video tutorials that might help with your curved piecing techniques:


Enjoy making your mug rug and building those quilting skills and have a blessed week!
Michele Hester

Sunday, March 20, 2011

Reasons why......

So, I now that I have had a few moments to sit down with my camera and computer, I wanted to share with you a few reasons I have been somewhat "absent" lately.

 Mostly, we have been running here and there for my daughter Sabra (holding the trophy) - she is on a competitive cheer-leading team. Over the last 2 months we have been in Birmingham, AL, Nashville, TN and lastly New Orleans, LA.

Here is my son, at the dinner table in New Orleans. I think the schedule is taking its toll on him as well.
 A few of the sights in New Orleans:

 We didn't get much sleep on the night we returned from New Orleans because our border collie Chelsea was restlessly anticipating her imminent labor. The next day, she gave birth to nine pups! Aren't they adorable?
They were born on March 17th and are all healthy pups. This was her first litter and she is a proud momma.

Well, that is what I have been up to lately. Unfortunately, not much sewing going on. In addition to all of this, I am in the process of moving my sewing studio - more on that later!

Until then,
Michele Hester

Friday, March 18, 2011

Mug Rug Monday - Flower and Butterfly (free mug rug pattern)

I am a little late, so please forgive me. We were in New Orleans for a brief vacation and I failed to plan ahead and get my mug rug pattern ready for you. Here is this week's free mug rug pattern:


Click here to download the pattern.


I don't know about you, but I am so glad to see Spring arriving! This week's mug rug pattern is an applique pattern in celebration of Spring. I hope that you enjoy it. I will be using a raw edge applique technique on this one. The pattern is here. You will see that there is a 1/4" seam allowance included in the pattern, so just cut that away if you intend to use a raw edge technique.

Thanks for stopping by and I will see you back on Monday!

Michele Hester

Name that mug rug giveaway winner

Thank you to all who participated in my first giveaway. Your task was to help me name this mug rug pattern:


There were many great suggestions - many of which were along the lines of fences, gardens, etc. You all must be dreaming of Spring just like me! Well I have chosen my favorite name and it is:


sulyle said...
Pathways in the Park. It reminds me of the pathways and park squares in Savannah.

You all may have noticed I am from Georgia and I have visited Savannah many times. As soon as this name was suggested, I knew it fit! Thank you sulyle.....I am sending you an e-mail now to get your information and your new sewing light will soon be on its way.

Michele Hester

Sunday, March 13, 2011

10,000 visits and Mug Rug Monday

wow! I can't believe that there have been 10,000 page views on this blog already! AND there are now 68 followers! Thank you all so much for spreading the word.  Mug rug Monday will be delayed this week because i am in New Orleans right now with only my cell phone  I can't believe i am going almost a week without a computer  i will be back on Thursday with details and the giveway

until then - Blessings to you!
Michele Hester

Wednesday, March 9, 2011

Dream or Calling?

One of my favorite reading blogs is Chatting at the Sky. Today's post posed the question as to whether there is a difference in a dream or a calling. For me, it was quite thought provoking. Here is what I came up with:

A dream is usually at least a little selfish and comes from within….a calling always requires putting aside self and comes from without. They both have great rewards though – much like the difference between happiness and joy.


Hmmm....clean it up a little and it would make a great cross-stitch quote!  LOL

Michele Hester

Tuesday, March 8, 2011

Mug Rug Monday - Rail Fence (free mug rug pattern)

I started home schooling my daughter Sabra this week. It is something that I have thought about since she was born, but just never felt I had the patience to do. Well, because of some really crazy things (WOW, who knew the girl drama could be this intense in the 3rd grade - there are some really mean girls around already) that happened to her in her school this last week, I decided it was time to make a drastic change.  .....Today, our first official day at our home school went very - well obviously it is all still very new to both of us. However, I am just now getting around to my post. Believe it or not, I know how to schedule posts, I just can't force myself to wait, once I get something written. Something about the excitement of that "hot off the press" smell.

Without further ado, here is this week's free mug rug pattern. This week's mug rug pattern is based on a very traditional quilt square called Rail Fence. Here is the mug rug:


Since it is really easy for traditional piecing, I thought I would just give the "loose" instructions on making it.....

I have chosen two colors in my sample. We will refer to the blue as color A and the red as color B. You will need two 1 1/2" wide strips of Color A and one 1 1/2" wide strip of Color B. Strips should be approximately 25 inches long for wiggle room.....

  1. Sew one strip of Color A and one strip of Color B together. 
  2. Press seam toward Color B. 
  3. Next, sew another strip of Color A to the other side of Color B. 
  4. Press seam toward Color A this time - so that both seams are pressed in the same direction.
  5. You should now have a 3-strip unit that measures 3 1/2" by 25 inches (or however long your strips were)
  6. Cut this 3-strip unit into 3 1/2" length pieces, to make 3 1/2" squares. 
  7. Arrange the blocks and join according to the sample image above. 
  8. To quilt, I recommend stitch in the ditch (great tip here) for this one.
  9. Bind according to your favorite (or not so favorite) method. ;-)

Here is a quilt I made a few years ago where I used a rail fence for my setting squares......

The rail fence blocks are stitched in the ditch. I did a quilt as you go method, that I made up as I went.....I actually pieced and quilted each row as a unit, and then I attached the rows together. The gorgeous embroidery patterns are ones that I got free off the internet 7 or 8 years ago, so I couldn't tell you where they were from....I have seen them out there recently, so maybe somebody else will comment and remind me from whence they came?

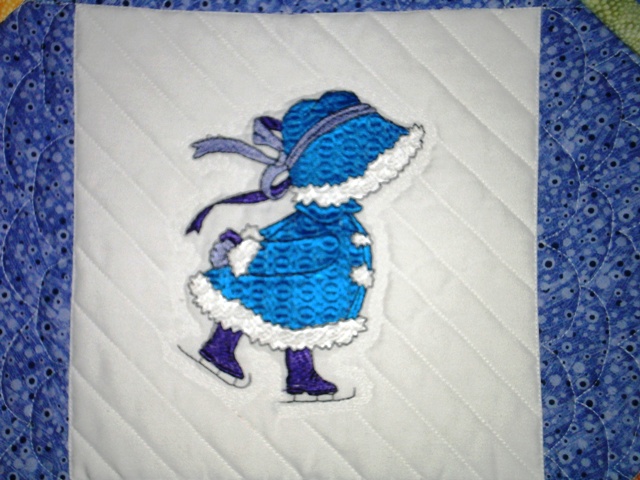
Here are some close-ups of some of the embroidered blocks:


The "shell" quilting around the outside of the embroidery blocks was done free motion, and is really a simple free motion pattern. I used regular old masking tape to mark my channel quilting surrounding the embroidery. Hope you enjoyed my trip down memory lane.. ;-)

This quilt was made for my daughter Sabra - I guess that means I have now come full circle in this post haven't I?  LOL Have a blessed week and I will see you next week!

Michele

P.s.

Beautiful Classic Floral Spray - Machine Embroidery Design

Click here for machine embroidery file Watch this design come to life on your fabric canvas. This gorgeous design has been thoughtfu...