I was so excited with how this Halloween Mug Rug turned out, that I wanted to share it with you again.

Here is another Halloween Mug Rug pattern where I digitized the applique pattern for my embroidery machine! But you can do traditional applique, if you don't have an embroidery machine.
Here is a closeup of the candy corn, since colors faded a bit on my full shots taken outside.....
As always, I am providing the mug rug pattern and even the candy corn
machine embroidery design free to you, so keep reading.......
Hoop
the black fabric and stabilizer (I used cut away) into a 5 x 7 (or
larger) hoop. Load the black fabric/stabilizer only into the machine and
stitch your layout outline (1st thread color.)
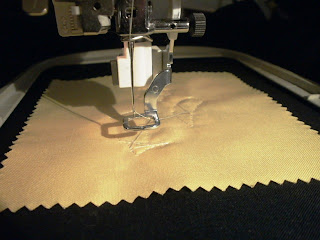
Now get ready to tack down the top color (I used white) of your candy
corn. For each of the three colors in the candy corn, I used a single
charm square. It is the perfect size for this pattern. One charm square
covers the whole area and each segment of that color is tacked down in
one step.
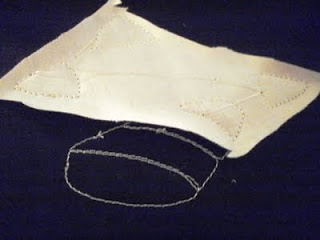
After stitching the tack down stitches for a color, trim away.
Those
stitches you see on the black background are the layout stitches that
sewed out in the first step. They show you where to lay your fabric for
tacking down.
Be sure to trim all of your jump stitches between each step. Also,
trim your applique as close to the seam line as possible. Applique or curved clipping scissors are a must for this project!
Repeat the process with the middle (second) color.
Note that I did not glue or baste my charm squares, I simply laid them
down on top of the design and had no problems with them bunching up or
flipping around. I was pleased with the ease of stitching out this
pattern.
I
used yellow in the middle, but I think that the orange was supposed to
go in the middle and yellow on bottom. Oh well, no one can say this
isn't original!
Once you have clipped the middle color pieces and all of the jump stitches, reload the hoop on your machine.
It's time for the tack down of the third and final color (orange in my case) on the bottom.

After
you have trimmed the final color pieces and jump stitches, reload the
hoop into the machine and get ready for the applique stitching around
the edges.
Again, be sure to trim as close to the tack down stitches as possible,
so that you don't end up with any frayed edges as you see in this
photo.I have made adjustments to my design to help, but you still have
to trim well.
Sandwich and quilt your applique design.
Bind as desired and there you have it! I am going let my daughter take this one to her teacher, along with a jar of candy corn.
I am uploading the
candy corn outline here, for those of you who want to do traditional applique or don't want to use the machine embroidery design.
If you would like the
free machine embroidery design,
I ask that you be a follower and leave me a comment telling me which
design format you need for your machine. I will e-mail you the design
file. If you don't know what type of file you need, tell me what brand
machine you have.
 So this one started out as an ugly fabric design. Notice the very dated brown calico was my ugly fabric. It was transformed by the addition of just a few colors. The deep red is what makes the most difference in my opinion. It pulls all of the others together.


